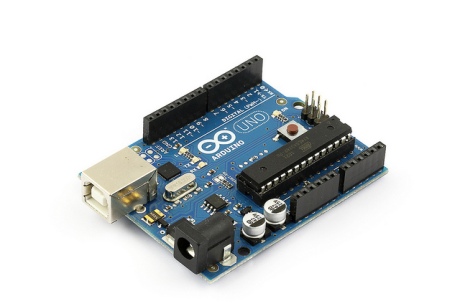
 I’ve been programming regularly in Mathematica for more than a year, using the language mostly for spidering, text mining and machine learning applications. But now that I am teaching my interactive exhibit design course again, I’ve started thinking about using Mathematica for physical computing and desktop fabrication tasks. First on my to do list was to find a way to send and receive data from the Arduino. A quick web search turned up the work of Keshav Saharia, who is close to releasing a package called ArduinoLink that will make this easy. In the meantime, Keshav helped me to debug a simple demonstration that uses the SerialIO package created by Rob Raguet-Schofield. There were a few hidden gotchas involved in getting this working on Mac OS X, so I thought I would share the process with others who may be interested in doing something similar.
On the Arduino side, I attached a potentiometer to Analog 1, and then wrote a simple program that waits for a signal from the computer, reads the sensor and then sends the value back on the serial port. It is based on the Serial Call and Response tutorial on the Arduino website.
/*
 arduino_mathematica_example

 This code is adapted from
 http://arduino.cc/en/Tutorial/SerialCallResponse

 When started, the Arduino sends an ASCII A on the serial port until
 it receives a signal from the computer. It then reads Analog 1,
 sends a single byte on the serial port and waits for another signal
 from the computer.

 Test it with a potentiometer on A1.
 */

int sensor = 0;
int inByte = 0;

void setup() {
  Serial.begin(9600);
  establishContact();
}

void loop() {
  if (Serial.available() > 0) {
    inByte = Serial.read();
    // divide sensor value by 4 to return a single byte 0-255
    sensor = analogRead(A1)/4;
    delay(15);
    Serial.write(sensor);
  }
}

void establishContact() {
  while (Serial.available() <= 0) {
    Serial.print('A');
    delay(100);
  }
}
Once the sketch is installed on the Arduino, close the Arduino IDE (otherwise the device will look busy when you try to interact with it from Mathematica). On the computer side, you have to install the SerialIO package in
/Users/username/Library/Mathematica/Applications
and make sure that it is in your path. If the following command does not evaluate to True
MemberQ[$Path, "/Users/username/Library/Mathematica/Applications"]
then you need to run this command
AppendTo[$Path, "/Users/username/Library/Mathematica/Applications"]
Next, edit the file
/Users/username/Library/Mathematica/Applications/SerialIO/Kernal/init.m
so the line
$Link = Install["SerialIO"]
reads
$Link =
Install["/Users/username/Library/Mathematica/Applications/SerialIO/MacOSX/SerialIO",
LinkProtocol -> "Pipes"]
If you need to find the port name for your Arduino, you can open a terminal and type
ls /dev/tty.*
The demonstration program is shown below. You can download both the Arduino / Wiring sketch and the Mathematica notebook from my GitHub repository. You need to change the name of the serial device to whatever it is on your own machine.
<<SerialIO`

myArduino = SerialOpen["/dev/tty.usbmodem3a21"]

SerialSetOptions[myArduino, "BaudRate" -> 9600]

SerialReadyQ[myArduino]

Slider[
 Dynamic[Refresh[SerialWrite[myArduino, "B"];
  First[SerialRead[myArduino] // ToCharacterCode],
  UpdateInterval -> 0.1]], {0, 255}]
The Mathematica code loads the SerialIO package, sets the rate of the serial connection to 9600 baud to match the Arduino, and then polls the Arduino ten times per second to get the state of the potentiometer. It doesn’t matter what character we send the Arduino (here we use an ASCII B). We need to use ToCharacterCode[] to convert the response to an integer between 0 and 255. If everything worked correctly, you should see the slider wiggle back and forth in Mathematica as you turn the potentiometer. When you are finished experimenting, you need to close the serial link to the Arduino with
SerialClose[myArduino]

0 Comments