Archives for category: Making

2017-02-15 13.31.54

On Thursday 2 November and Monday 6 November 2017, I will be holding one day, hands-on hacking workshops in my lab at Western University in London, Ontario, Canada. The theme of the workshops is noise / glitch / breakdown in electronically mediated sound and music. Twelve to sixteen participants will work in teams of 3-4 to prototype projects that can draw on a wide variety of custom and off-the-shelf electroacoustic modules. These include a sensors, littleBits synth and cloudbit kits, the MIDI Sprout, Mogees, the Open Music Labs Audio Sniffer, circuit-bent toys and effects pedals and the KOMA Field Kit, as well as DAWs (e.g., Ableton, Bitwig), MIDI controllers and live coding (e.g., Max, Pure Data).

These workshops are successors to one that Edward Jones-Imhotep and I organized at InterAccess in Toronto in 2009 (the problematic for that first workshop was e-waste). Here we will be piggybacking on the annual meeting of the Canadian Science and Technology Historical Association which will be bringing many humanists with a technoscientific bent to town. The theme of this year’s CSTHA conference is “science, technology and historical meanings of failure.” (N.B. #hackknow2 is not an official CSTHA event so you don’t have to be a member to participate, but members are, of course, welcome!)

A couple of logistical things: I don’t have any funding for this workshop, so I can’t provide travel, accommodations, food, etc.  I will provide all equipment and supplies and there are no registration fees. The Thursday workshop is already full, but there are a few slots available for the Monday workshop. If you would really like to be involved, please send me a brief e-mail telling me about yourself and your interests and I will get back to you as soon as I can.

arseneauj-3d-imaging-fail-edited

For a couple of years I have been working on outfitting the History Department at Western University with a new digital lab and classroom, funded by a very generous grant from our provost. The spaces are now open and mostly set up, and our graduate students and faculty have started to form working groups to teach themselves how to use the hardware and software and to share what they know with others. There is tremendous excitement about the potential of our lab, which is understandable. I believe that it is the best-equipped such space in the world: historians at Western now have their own complete Fab Lab.

In provisioning the lab and classroom, I wanted to strike a balance between supporting the kinds of activities that are typically undertaken in digital history and digital humanities projects right now, while also enabling our students and faculty to engage in the kind of “making in public” that many people argue will characterize the humanities and social sciences in the next decade.

Here is a high-level sketch of our facilities, organized by activity. The lab inventory actually runs to thousands of items, so this just an overview.

composite

To date, the facilities have been used most fully by Devon Elliott, a PhD student who is working with Rob MacDougall and I. Devon’s dissertation is on the technology and culture of stage magic. In his work, he designs electronics, programs computers, does 3D scanning, modeling and printing, builds illusions and installations and leads workshops all over the place. You can learn more about his practice in a recent edition of the Canadian Journal of Communication and in the forthcoming #pastplay book edited by Kevin Kee. (Neither of these publications are open access yet, but you can email me for preprints.) Devon and I are also teaching a course on fabrication and physical computing at DHSI this summer with Jentery Sayers and Shaun Macpherson.

Past students in my interactive exhibit design course have also used the lab equipment to build dozens of projects, including a robot that plays a tabletop hockey game, a suitcase that tells the stories of immigrants, a batting helmet to immerse the user in baseball history, a device that lets the Prime Ministers on Canadian money tell you about themselves, a stuffed penguin in search of the South Pole, and many others. This year, students in the same class have begun to imagine drumming robots, print 3D replicas of museum artifacts, and make the things around them responsive to people.

In the long run, of course, the real measure of the space will be what kind of work comes out of it. While I don’t really subscribe to the motto “if you build it, they will come”, I do believe that historians who want to work with their hands as well as their heads have very few opportunities to do so. We welcome you! We’re very interested in taking student and post-doc makers and in collaborating with colleagues who are dying to build something tangible. Get excited and make things!

In my previous post, I showed how to connect an Arduino microcontroller to Mathematica on Mac OS X using the SerialIO package.  It is also quite straightforward to interact with Phidgets.  In this case we can take advantage of Mathematica’s J/Link Java interface to call the Phidgets API.  This is basically a ‘hello world’ demonstration.  For a real application you would include error handling, event driven routines, and so on.  For more details, read the Java getting started tutorial and Phidgets programming manual, then look at the sample code and javadocs on this page.

Start by installing the Mac OS X Phidgets driver on your system. Once you have run Phidgets.mpkg you can open System Preferences and there will be a pane for Phidgets.  For my test, I used a PhidgetInterfaceKit 8/8/8 with an LED on Output 2 and a 60mm slider (potentiometer) attached to Sensor 0. Once you have the hardware configuration you like, plug the InterfaceKit into the USB. It should show up in the General tab of system preferences. If you double click on the entry, it will start a demonstration program that allows you to make sure you can toggle the LED and get values back from the slider. When everything is working correctly, you can close the program and open Mathematica.

In a Mathematica notebook, you are going to load the J/Link package, install Java, and put the phidget21.jar file on your class path by editing the AddToClassPath[] command in the snippet below.

Needs["JLink`"]
InstallJava[]
AddToClassPath["/path/to/phidget21"]
phidgetsClass = LoadJavaClass["com.phidgets.InterfaceKitPhidget"]

Next, create a new instance of the InterfaceKit object, open it and wait for attachment. You can include a timeout value if you’d like. Once the InterfaceKit is attached, you can query it for basic information like device name, serial number and sensor and IO options.

ik = JavaNew[phidgetsClass]
ik@openAny[]
ik@waitForAttachment[]
ik@getSerialNumber[]
ik@getDeviceName[]
{ik@getOutputCount[], ik@getInputCount[], ik@getSensorCount[]}

Finally you can use Mathematica‘s Dynamic[] functionality to create a virtual slider in the notebook that will waggle back and forth as you move the physical slider attached to the InterfaceKit. You can also turn the LED on and off by clicking a dynamic checkbox in the notebook.

Slider[
 Dynamic[
  Refresh[ik@getSensorValue[0], UpdateInterval -> 0.1]], {0, 1000}]

bool=false;
Dynamic[ik@setOutputState[2, bool]]
Checkbox[Dynamic[bool]]

When you are finished experimenting, close the InterfaceKit object.

ik@close[]

I’ve been programming regularly in Mathematica for more than a year, using the language mostly for spidering, text mining and machine learning applications. But now that I am teaching my interactive exhibit design course again, I’ve started thinking about using Mathematica for physical computing and desktop fabrication tasks. First on my to do list was to find a way to send and receive data from the Arduino. A quick web search turned up the work of Keshav Saharia, who is close to releasing a package called ArduinoLink that will make this easy. In the meantime, Keshav helped me to debug a simple demonstration that uses the SerialIO package created by Rob Raguet-Schofield. There were a few hidden gotchas involved in getting this working on Mac OS X, so I thought I would share the process with others who may be interested in doing something similar.

On the Arduino side, I attached a potentiometer to Analog 1, and then wrote a simple program that waits for a signal from the computer, reads the sensor and then sends the value back on the serial port.  It is based on the Serial Call and Response tutorial on the Arduino website.

/*
 arduino_mathematica_example

 This code is adapted from
 http://arduino.cc/en/Tutorial/SerialCallResponse

 When started, the Arduino sends an ASCII A on the serial port until
 it receives a signal from the computer. It then reads Analog 1,
 sends a single byte on the serial port and waits for another signal
 from the computer.

 Test it with a potentiometer on A1.
 */

int sensor = 0;
int inByte = 0;

void setup() {
  Serial.begin(9600);
  establishContact();
}

void loop() {
  if (Serial.available() > 0) {
    inByte = Serial.read();
    // divide sensor value by 4 to return a single byte 0-255
    sensor = analogRead(A1)/4;
    delay(15);
    Serial.write(sensor);
  }
}

void establishContact() {
  while (Serial.available() <= 0) {
    Serial.print('A');
    delay(100);
  }
}

Once the sketch is installed on the Arduino, close the Arduino IDE (otherwise the device will look busy when you try to interact with it from Mathematica).  On the computer side, you have to install the SerialIO package in

/Users/username/Library/Mathematica/Applications

and make sure that it is in your path.  If the following command does not evaluate to True

MemberQ[$Path, "/Users/username/Library/Mathematica/Applications"]

then you need to run this command

AppendTo[$Path, "/Users/username/Library/Mathematica/Applications"]

Next, edit the file

/Users/username/Library/Mathematica/Applications/SerialIO/Kernal/init.m

so the line

$Link = Install["SerialIO"]

reads

$Link =
Install["/Users/username/Library/Mathematica/Applications/SerialIO/MacOSX/SerialIO",
LinkProtocol -> "Pipes"]

If you need to find the port name for your Arduino, you can open a terminal and type

ls /dev/tty.*

The demonstration program is shown below.  You can download both the Arduino / Wiring sketch and the Mathematica notebook from my GitHub repository.  You need to change the name of the serial device to whatever it is on your own machine.

<<SerialIO`

myArduino = SerialOpen["/dev/tty.usbmodem3a21"]

SerialSetOptions[myArduino, "BaudRate" -> 9600]

SerialReadyQ[myArduino]

Slider[
 Dynamic[Refresh[SerialWrite[myArduino, "B"];
  First[SerialRead[myArduino] // ToCharacterCode],
  UpdateInterval -> 0.1]], {0, 255}]

The Mathematica code loads the SerialIO package, sets the rate of the serial connection to 9600 baud to match the Arduino, and then polls the Arduino ten times per second to get the state of the potentiometer.  It doesn’t matter what character we send the Arduino (here we use an ASCII B).  We need to use ToCharacterCode[] to convert the response to an integer between 0 and 255.  If everything worked correctly, you should see the slider wiggle back and forth in Mathematica as you turn the potentiometer.  When you are finished experimenting, you need to close the serial link to the Arduino with

SerialClose[myArduino]

For a number of years I’ve taught a studio course in our public history graduate program on designing interactive exhibits. Most academic historians present their work in monographs and journal articles unless they are way out there on the fringe, in which case they may be experimenting with trade publications, documentary film, graphic novels, photography, websites, blogs, games or even more outré genres. Typically the emphasis remains on creating representations that are intended to be read in some sense, ideally very carefully. Public historians, however, need to be able to communicate to larger and more disparate audiences, in a wider variety of venues, and in settings where they may not have all, or even much, of the attention of their publics. Exhibits that are designed merely to be read closely are liable to be mostly ignored. When that happens, of course, it doesn’t matter how interesting your interpretation is.

Students in the course learn how to embed their interpretations in interactive, ambient and tangible forms that can be recreated in many different settings. To give some idea of the potential, consider the difference between writing with a word processor and stepping on the brake of a moving car. While using a word processor you are focused on the task and aware that you are interacting with a computer. The interface is intricate, sensorimotor involvement is mostly limited to looking and typing, and your surrounding environment recedes into the background of awareness. On the other hand, when braking you are focused on your involvement with the environment. Sensorimotor experiences are immersive, the interface to the car is as simple as possible, and you are not aware that you are interacting with computers (although recent-model cars in fact have dozens of continuously operating and networked microcontrollers).

Academic historians have tended to emphasize opportunities for knowledge dissemination that require our audience to be passive, focused and isolated from one another and from their surroundings. When we engage with a broader public, we need to supplement that model by building some of our research findings into communicative devices that are transparently easy to use, provide ambient feedback, and are closely coupled with the surrounding environment. The skills required to do this come from a number of research fields that ultimately depend on electronics and computers. Thanks to the efforts of community-minded makers, hackers, and researchers, these techniques are relatively easy to learn and apply.

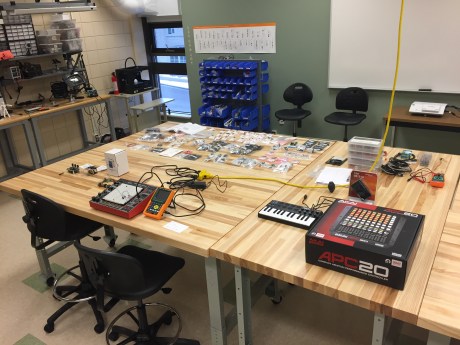
Physical computing. In order to make objects or environments aware of people, to make them responsive and interactive, we need to give them a better sense of what human beings are like and what they’re capable of (Igoe & O’Sullivan 2004; Igoe 2011). Suppose your desktop computer had to guess what you look like based on your use of a word processer.  It could assume that you have an eye and an ear–because you respond to things presented on the screen and to beeps–and it could assume you have a finger–because you push keys on the keyboard. To dramatize this, I usually use the image above, which is based on a drawing in Igoe and O’Sullivan (2004). It looks horrible: people are nothing like that. By giving our devices a better sense of what we’re actually like, we make it possible for them to better fit into our ongoing lifeworlds.

Pervasive computing. We are at the point where computational devices are becoming ubiquitous, invisible, part of the surroundings (McCullough 2004). The design theorist Adam Greenfield refers to this condition as “everyware” (2006). A number of technologies work together to make this possible. Embedded microprocessors put the power of full computers into tiny packages. Micro-electro-mechanical systems (MEMS) include sensors and actuators to sense and control the environment. Radio transceivers allow these miniature devices to communicate with one another and get online. Passive radio frequency ID circuits (RFIDs) are powered by radio waves to transmit identifying information. All of these systems are mass-produced so that unit costs are very low, and it becomes possible to imagine practically everything being manufactured with its own unique identifier and web address. This scenario is sometimes called the “internet of things.” Someday instead of searching for your keys you may be able to Google for them instead. As Bruce Sterling notes, practically everything in the world could become the “protagonist of a documented process” (2005). Provenance has typically had to be reconstructed painstakingly for a tiny handful of objects. Most historians are not ready to conduct research in a world where every object can tell us about its own history of manufacture, ownership, use, repair, and so on. Dealing with pervasive computation will require the ability to quickly focus on essential information, to relegate non-essential information to peripheral awareness, and to access information in the places and settings where it can make a difference.

Interaction Design. The insinuation of computation and interactivity into every conceivable setting has forced designers to abandon the traditional idea of “human-computer interaction,” and to take a much more expansive perspective instead (Moggridge 2006; Saffer 2006). Not only is everything becoming a potential interface, but many smart devices are better conceptualized as mediating between people, rather than between person and machine. Services like ordering a cup of coffee at Starbucks are now designed using the same techniques as those used to create interactive software (e.g., Google calendar) and hardware (e.g., the iPod). In order to benefit from the lessons of interaction design, historians will have to take into account the wide range of new settings where we can design experiences and shape historical consciousness. The technology of tangible computing provides a link between pervasive devices, social interaction, and the material environment (Dourish 2004).

Desktop Fabrication. Most radical of all, everything that is in digital form can be materialized, via machines that add or subtract matter. The former include a range of 3D printing technologies that deposit tiny amounts of glue, plastic or other materials, or that use lasers to selectively fuse small particles of metal, ceramic or plastic. The latter include computer-controlled milling machines, lathes, drills, grinders, laser cutters and other tools. The cost of these devices has been dropping rapidly, while their ease-of-use increases. The physicist Neil Gershenfeld has assembled a number of “fab labs”—universal fabrication laboratories—from collections of these devices. At present, a complete fab lab costs around $30-$40,000 and a few key machines are considerably cheaper (Gershenfeld 2000, 2007). Enthusiasts talk about the possibility of downloading open source plans and “printing out” a bicycle, an electric guitar, anything really. An open source hardware community is blossoming, aided in part by O’Reilly Media’s popular MAKE magazine and by websites like Instructables and Thingiverse. Desktop fabrication makes it possible to build and share custom interactive devices that communicate our knowledge in novel, material forms.

References

  • Dourish, Paul. Where the Action Is: The Foundations of Embodied Interaction. Cambridge, MA: MIT, 2004.
  • Gershenfeld, Neil. When Things Start to Think. New York: Holt, 2000.
  • Gershenfeld, Neil. Fab: The Coming Revolution on Your Desktop—From Personal Computers to Personal Fabrication. New York: Basic, 2007.
  • Greenfield, Adam. Everyware: The Dawning Age of Ubiquitous Computing. Berkeley, CA: New Riders, 2006.
  • Igoe, Tom. Making Things Talk, 2nd ed. Sebastopol, CA: O’Reilly, 2011.
  • Igoe, Tom and Dan O’Sullivan. Physical Computing: Sensing and Controlling the Physical World with Computers. Thomson Course Technology, 2004.
  • McCullough, Malcolm. Digital Ground: Architecture, Pervasive Computing and Environmental Knowing. Cambridge, MA: MIT, 2004.
  • Moggridge, Bill. Designing Interactions. Cambridge, MA: MIT, 2006.
  • Norretranders, Tor. The User Illusion: Cutting Consciousness Down to Size. New York: Penguin, 1999.
  • Saffer, Dan. Designing for Interaction: Creating Smart Applications and Clever Devices. Berkeley, CA: New Riders, 2006.
  • Sterling, Bruce. Shaping Things. Cambridge, MA: MIT, 2005.
  • Torrone, Phillip. “Open Source Hardware, What Is It? Here’s a Start…” MAKE: Blog (23 Apr 2007).

From 2005 to 2008 I kept a research weblog called Digital History Hacks. As an open access, open content publishing platform, the blog served my purposes nicely. It was less well suited to sharing open source code, however, and didn’t support humanistic fabrication at all. Adding a private wiki helped a little bit, but didn’t go nearly far enough. So I decided to build The New Manufactory around the following ideas.

Working in the Heraclitean mode. If it ever made sense to divide scholarship into phases of research and writing, it no longer does. We now have to work in a mode where things around us are constantly changing, and we’re trying to do everything, all the time. As Heraclitus supposedly said, “all is flux.” So until your interpretation stabilizes…

  • You keep refining your ensemble of questions
  • Your spiders and feeds provide a constant stream of potential sources
  • Unsupervised learning methods reveal clusters which help to direct your attention
  • Adaptive filters track your interests as they fluctuate
  • You create or contribute to open source software as needed
  • You write/publish incrementally in an open access venue
  • Your research process is subject to continual peer review
  • Your reputation develops

Assemblages and rhizomes. Digital scholarship adds algorithms, source code, digital representations, version control, networked collaborators, application programming interfaces, simulations, machine learners, visualizations and a slew of other new things to philology. Beyond that, fabrication adds tools, instruments, materials, machines, workbenches, techniques, feedstock, fasteners, electronics, numerical control, and so on. The things that we have to figure out don’t come in neat packages or fit into hierarchies.

A tight loop between digitization and materialization. Digital representations have a number of well known qualities: they’re perfectly plastic, can be duplicated almost without cost, transmitted in the blink of an eye and stored in vanishingly small physical spaces. Every digital source can also be the subject of computational processing. So it makes a lot of sense to create and share digital records. Freeing information in this social sense, however, doesn’t mean that information can or should always be divorced from material objects or particular settings. We can link the digital and material with GPS, RFIDs, radio triangulation, barcodes, computer vision or embedded network servers. We can augment the material world with digital sources, and increasingly we can materialize digital sources with 3D printers or inexpensive CNC mills and lathes.

Everything should be self-documenting. Recording devices like sensors, scanners and cameras can be built into the workbench. They can automatically upload and archive photographs, videos, audio files and other kinds of digital representations. Electronic instruments can be polled for measurements. Machine tools can report their status via syndicated feeds. When we make and use things in the world, we can make and make use of born-digital data, too.

Co-presence and telepresence. Human beings (and other primates) learn by watching one another’s eyes and hands, so why not make it possible to do this remotely? Workers at a pair of augmented workbenches could be made aware of one another’s actions by a stream of low-latency signals. Sensors and actuators could support remote gesture, touch, manipulation and a sense of presence. Services like Pachube can be used to leverage this information, so that it can be remixed and repurposed.

This is a Darwin RepRap that was built by WJT from a kit from Bits from Bytes. It was started in May 2009, and first successfully printed on 27 November 2009. A heated bed was added in May 2010, built in the Czech Republic by Josef Prusa.

About This Build

  • Build: May 2009 – June 2009
  • Tuning: June 2009 – December 2009
  • First successful print: 27 November 2009
  • Tuning with heated bed: May 2010

Contents

  1. Image Gallery
  2. Useful Links
  3. Skeinforge Settings for Unheated Bed
  4. Skeinforge Settings for Heated Bed

Image Gallery

Go to the image gallery at Flickr.

Useful Links

Skeinforge Settings for Unheated Bed

  • Material: ABS from MakerBot.com
  • Start with Rapman ABS default settings
  • No extruder fan for any prints
  • Smaller parts (less than 50mm on a side with raft)
    • Feed Rate 12 mm/s
    • Raft Temp 235 C
    • First Layer 230 C
    • Next Layers 240 C
    • Raft Margin 5 mm
    • Extrusion 270 (27 RPM)
  • Medium parts
    • Feed Rate 8 mm/s
    • Raft Temp 233 C
    • First Layer 228 C
    • Next Layers 238 C
    • Raft Margin 10 mm
    • Extrusion 250 (25 RPM)

Skeinforge Settings for Heated Bed

  • Test Raft
    • Started with 500 W power supply
    • Test raft breaks free when thermistor temp is 46 C (infrared temp around 62 C)
    • Test raft sticks when thermistor temp is 61-63 C (IR temp around 77-80 C)
    • Feed Rate 20.7 mm/s
    • Head Speed 4.0 mm/s
    • Raft Temp 235 C
    • Bed Target Temp 100 C
  • Raftless Object
    • Still having problems getting a raftless object to stick to the bed (with kapton tape on aluminum). Current ratio of flow rate to feed rate is 17.86
    • Bed Temp 100 C
    • Feed Rate 28.0 mm/s
    • Flow Rate (Extrusion) 500 (50 RPM)
    • Temp of Raft 238
    • Temp of First Layer 238
    • Temp of Shape 238 C
    • Raft Base Layers 0
    • Raft Interface Layers 0
    • Things to Try Next…
      • Replace Power Supply with 750 W unit
      • Update Skeinforge
      • Increase temp a little bit (240 C?)
      • Increase feed rate while keeping flow:feed ratio the same or raising it slightly
      • Up flow rate to feed rate ratio a bit
      • Install Raftless plug in?

The MakerBot Cupcake is a RepRap-derived 3D printer. I built machine number 00018 between 24 April 2009 and 18 February 2010.

About This Build

  • Machine number: 18
  • Build: 24 Apr 2009 – 15 Feb 2010
  • Tuning: 15 Feb 2010 – 18 Feb 2010
  • First Successful Print: 18 Feb 2010

Contents

  1. Image Gallery
  2. Useful Links
  3. Testing the Electronics
  4. Tuning
  5. Thermistor Settings
  6. Skeinforge Settings

Image Gallery

Go to the image gallery at Flickr.

Useful Links

Testing the Electronics

  • Opto-endstops
    • Checked all connections with dissecting microscope set at 0.7 x 10x
    • Re-soldered one loose joint
    • Used PB-503 proto-board to build a little test rig for both kinds of connection
    • All endstops seem to be working correctly
  • Stepper motor drivers
    • Checked all SMD and through-hole connections with dissecting microscope
    • Had to ground the sense line of the ATX power supply unit to get it to power on without a computer attached (following Masked Retriever’s hack)
    • Checked that green power LED comes on for all stepper motor drivers
  • Burning the bootloader
    • Used Arduino 0017 on Mac OS X with Sanguino 1.4-r1 support
    • USBTinyISP needs to have jumper across two pins near cables in order to provide +5V to Sanguino
    • Power LED on Sanguino doesn’t light up even though Arduino software claims that bootloader burns successfully
  • Firmware
    • Using RepRap Gen 3 Firmware 1.2
    • Don’t forget to copy reprap-r3g-firmware-1.x/libraries/* to arduino-00xx/hardware/libraries/ (otherwise you will get an error that it can’t find simplepacket.h)
  • Debugging
    • The power LED never lights up on the Sanguino
    • Unfortunately I am now getting the following error: “avrdude: stk500_recv(): programmer is not responding”
    • Tried connecting LED to Pin 13 and resetting. It doesn’t flash, which suggests something may be wrong with bootloader. When I power with the ATX power supply and hit the reset button, the Debug light flashes 4 times; the power light doesn’t come on at all.
    • Tried putting a low voltage through the SMD LEDs that indicate Power and Debug (on the LEDs, cathode is marked with green stripe). Both LEDs work.
    • Replaced motherboard.
    • Once motherboard replaced, extruder controller and stepper motor drivers work perfectly
    • Invert Y axis in ReplicatorG

Tuning

  • First mini mug is eye-shaped when looking down at it from above. Loose belt on X axis.
  • ABS sticks to foamcore but object pops loose halfway through build. Made an acrylic plate to cover the build platform, covered one side with kapton tape and roughed the other with sandpaper.
  • Natural ABS extrudes smoothly at 220 degrees C
  • Difficult to get ABS to stick to the platform
  • Part way through a full day of tuning, realized that the idler wheel had slipped sideways off of the bearing and the filament was jammed beside it. Disassembled extruder and rebuilt idler wheel and bearing with Special T cyanoacrylate. Johnny Russell also suggested using a zip tie as a filament guide, shown in this photo. If the problem recurs, might try double-thick idler wheel or machining new one out of some other material.

Thermistor Settings

  • Assume I have older (1mm) thermistor – didn’t measure it before building extruder
  • Beta=4881, r0=93700, t0=24

Skeinforge Settings

  • Material: MakerBot Natural ABS
  • Start with Configuring Skeinforge page
  • N.B. These settings are pretty good, but could use a little more tuning; see the “Fundamental Settings” section of the Configuring Skeinforge page to get them perfect
  • Carve
    • Layer Height: 0.4
  • Raft
    • Temperature of Raft: 220
    • Temperature of Shape Next Layers: 220
    • Temperature of Shape First layer Outline: 220
    • Temperature of Shape First Layer Within: 220
    • Temperature change times: 0
    • Interface Layers: 0
    • Base Layer Thickness over Layer Thickness: 1.7
    • Raft Outset Radius Over Extrusion Width: 10
  • Speed
    • Flowrate Choice: PWM
    • Flowrate PWM Setting: 255
    • Feedrate: 25
  • Fill
    • Solid Surface Thickness: 3
    • Extra Shells On Sparse Layers: 2
    • Extra Shells on Base Layers: 3
    • Extra Shells On Alternating Solid Layers: 1
    • Infill Pattern: Grid Rectangular
  • Deactivated modules
    • Cool
    • Hop
    • Oozebane
    • Stretch
    • Unpause
    • Comb
    • Multiply
    • Polyfile
    • Wipe