Wolfram Screencast & Video Gallery

Scholars in history and other humanities tend to work differently than their colleagues in science and engineering. Working alone or occasionally in small groups, their focus is typically on the close reading of sources, including text and images. Mathematica’s high-level commands and holistic approach make it possible for a single programmer to implement relatively complex research tools that are customized for a particular study. Here William J Turkel describes a few examples, including the mining and conceptual analysis of text, and image mining applied to electronic schematics, photographs of bridges and the visual culture of stage magic. He also discuss the opportunities and challenges of teaching these kinds of skills to university students with little or no technical background.

Here are some references and links for seminars that I conducted for my department’s “High School History Day” in November 2019.

The conceit of historians as detectives is very common in the field. By far my favorite exploration of historical detection is the essay “Clues” by Carlo Ginzburg, which appears in his collection Clues, Myths and the Historical Method (Baltimore: Johns Hopkins University Press, 1989). One book that many of us have on our shelves is Robin W. Winks, ed. The Historian as Detective: Essays on Evidence (New York: Harper & Row, 1969). Winks also authored a book on the relations between the intelligence community and the university, Cloak and Gown: Scholars and the Secret War, 1939-1961 (2nd ed, New Haven: Yale University Press, 1996). A more recent collection flips the premise, looking at what we can learn about the past by reading historical crime fiction: Ray B. Browne & Lawrence A. Kreiser, Jr., eds., The Detective as Historian: History and Art in Historical Crime Fiction (Madison: University of Wisconsin, 2000). Peirce’s three kinds of inference (and their connection to detective literature) are the subject of Umberto Eco & Thomas A. Sebeok, eds., The Sign of the Three: Dupin, Holmes, Peirce (Bloomington: Indiana University Press, 1988).

Determining when and where a picture was taken is one kind of verification task. The Bellingcat website has links to many resources, including daily quizzes. The two examples of Pence’s ‘historic journey’ on Twitter come from an article by Nicole Dahmen. The photo of the man in the pit of water comes from this New York Times article. Hany Farid has made a career of developing sophisticated techniques for authenticating digital images. His new text Photo Forensics (Cambridge, MA: MIT Press, 2016) is a wonderful resource. The Lee Harvey Oswald example is discussed in this news article.

The example of all of the things that one can infer about a society from a single coin was adapted from Louis Gottschalk, Understanding History: A Primer of Historical Method (New York: Alfred A. Knopf, 1950). The map of 19th century shipping comes from the work of digital historian Ben Schmidt on the US Maury collection of the government’s database of ship’s paths. The example of finding Paul Revere from metadata comes from a clever and accessible blog post by sociologist Kieran Healy.

John North’s incredibly detailed analysis of Hans Holbein’s painting The Ambassadors appears in The Ambassadors’ Secret: Holbein and the World of the Renaissance (New ed, London: Phoenix, 2004). The still undeciphered Voynich manuscript is in the Beinicke Rare Book and Manuscript Library at Yale University.

Here are some links for Spring 2019 talks on computational history that I gave at the Fields Institute and MIT.

Sites that can be used with no prior programming experience:

If you are comfortable with scripting:

Technical sources:

Historiography:

  • Brugger, The Archived Web (2019)
  • Hartog, Regimes of Historicity (2016)
  • Milligan, History in the Age of Abundance? (2019)
  • Snyder, The Road to Unfreedom (2018)
  • Tooze, Crashed (2018)


2017-02-15 13.31.54

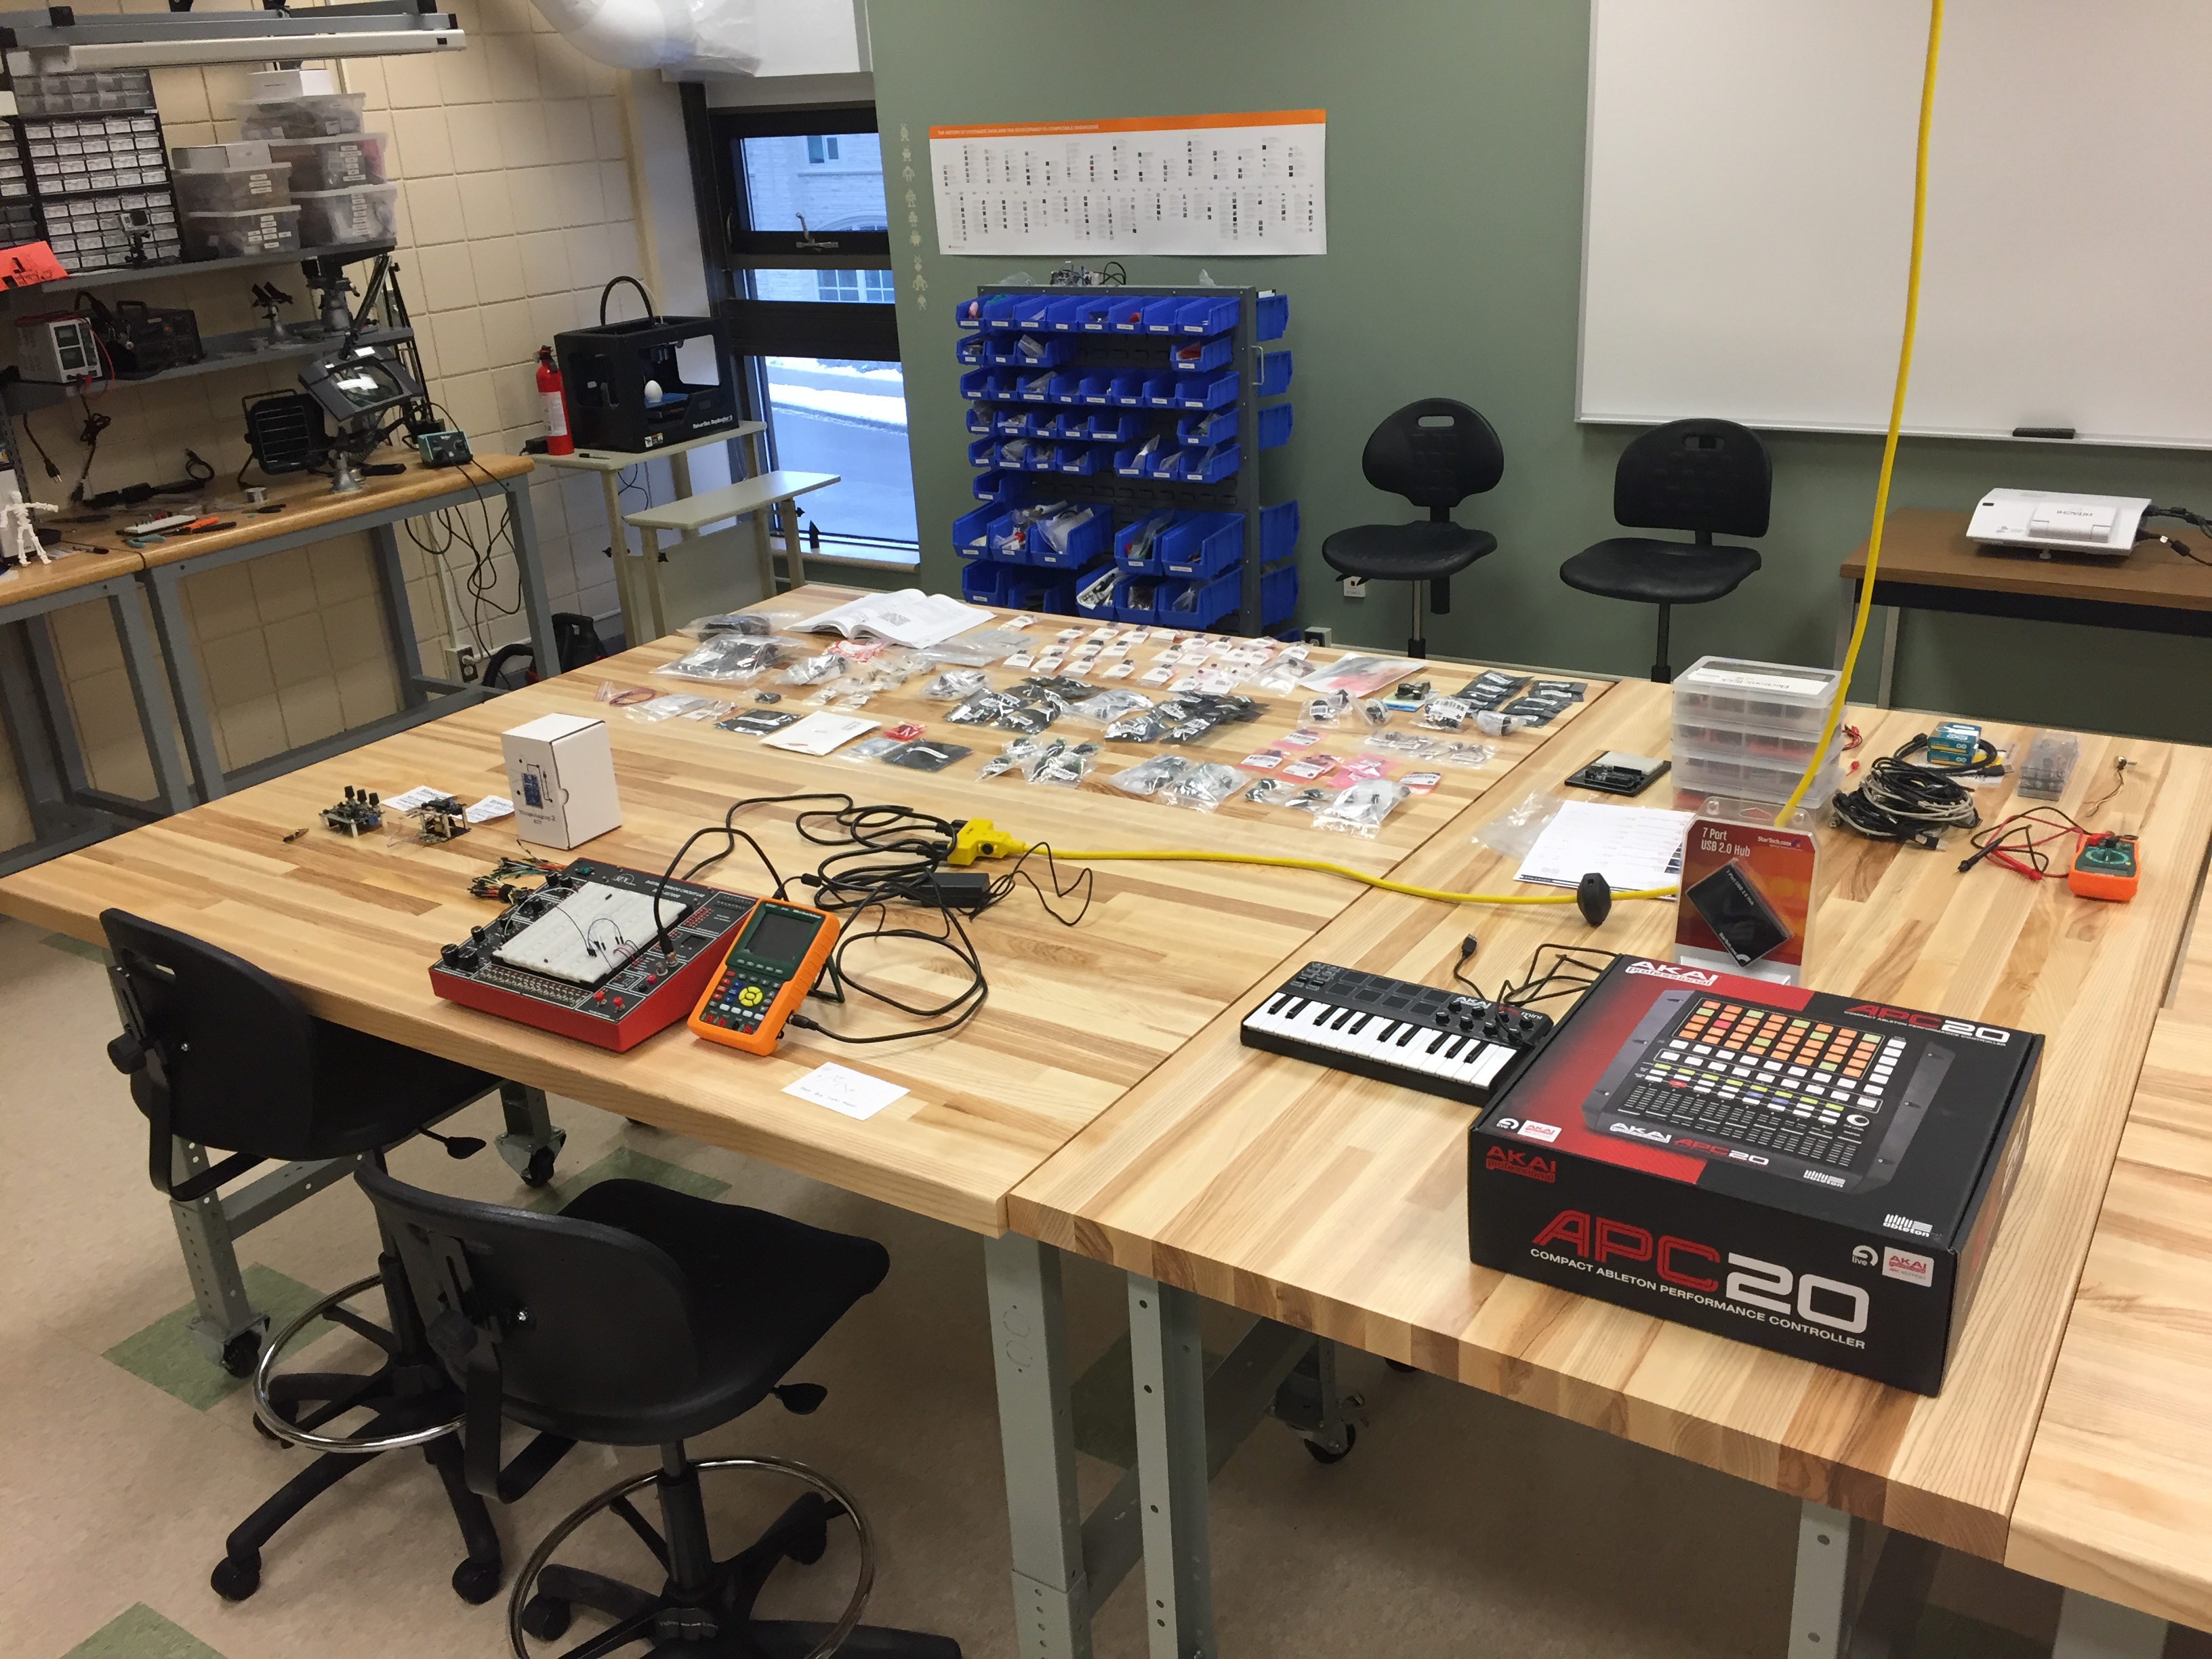
On Thursday 2 November and Monday 6 November 2017, I will be holding one day, hands-on hacking workshops in my lab at Western University in London, Ontario, Canada. The theme of the workshops is noise / glitch / breakdown in electronically mediated sound and music. Twelve to sixteen participants will work in teams of 3-4 to prototype projects that can draw on a wide variety of custom and off-the-shelf electroacoustic modules. These include a sensors, littleBits synth and cloudbit kits, the MIDI Sprout, Mogees, the Open Music Labs Audio Sniffer, circuit-bent toys and effects pedals and the KOMA Field Kit, as well as DAWs (e.g., Ableton, Bitwig), MIDI controllers and live coding (e.g., Max, Pure Data).

These workshops are successors to one that Edward Jones-Imhotep and I organized at InterAccess in Toronto in 2009 (the problematic for that first workshop was e-waste). Here we will be piggybacking on the annual meeting of the Canadian Science and Technology Historical Association which will be bringing many humanists with a technoscientific bent to town. The theme of this year’s CSTHA conference is “science, technology and historical meanings of failure.” (N.B. #hackknow2 is not an official CSTHA event so you don’t have to be a member to participate, but members are, of course, welcome!)

A couple of logistical things: I don’t have any funding for this workshop, so I can’t provide travel, accommodations, food, etc.  I will provide all equipment and supplies and there are no registration fees. The Thursday workshop is already full, but there are a few slots available for the Monday workshop. If you would really like to be involved, please send me a brief e-mail telling me about yourself and your interests and I will get back to you as soon as I can.

This past summer, Ian Milligan, Mary Beth Start and I worked on customizing a Debian Linux virtual machine for doing historical research using digital primary and secondary sources. The machine is called HistoryCrawler, and runs on both Macs and PCs. You can build one of your own by following the steps below.

1. Install VirtualBox and create a Debian Linux VM using the instructions here.

2. Disable attempts to load software from CDROM. Log into the VM, open a terminal (e.g., Konsole, UXterm) and using the following command, comment out the cdrom line of sources.list

sudo vi /etc/apt/sources.list

3. Update and upgrade.

sudo apt-get update
sudo apt-get upgrade

4. Install Guest Additions for VirtualBox VM using the reference here.

4a. Install DKMS.

sudo apt-get install dkms
sudo apt-get install linux-headers-3.14-1-486

4b. Reboot the guest system with Leave->Restart in KDE.

4c. Insert CD image. In VirtualBox menubar of guest machine (i.e., the Debian virtual machine) choose Devices->Insert Guest Additions CD Image.

4d. (Optional) Check drive has been mounted. Open up Dolphin File Manager. On the left hand side you should see the VBOXADDITIONS drive has been mounted.

4e. Open a terminal and enter the following commands.

cd /media/cdrom
sudo sh ./VBoxLinuxAdditions.run

4f. Reboot the guest system with Leave->Restart in KDE.

5. Drag and Drop. Set up bidirectional drag and drop (Devices->Drag’n’Drop) and shared clipboard. Try copying a URL from the host operating system and pasting it into Konqueror web browser with Ctrl-V. Then copy something from guest system with Ctrl-C and try pasting it in host OS.

6. Shared Folder. Shut the VM down completely, then follow these instructions to set up a shared folder. The instructions are actually older than the newest version of VirtualBox; you want to make your shared folder permanent and automount it. The shared folder is

/media/sf_shared-folder

6b. Permissions. Give the hcu user permissions to interact with shared folder by adding him/her to vboxsf group.

sudo usermod -a -G vboxsf hcu

6c. Reboot the guest system with Leave->Restart in KDE and then confirm that the hcu user can now access /media/sf_shared-folder at the terminal or with Dolphin.

6d. (Optional) Set up Kuser tool to manage users and groups. Access this tool with Applications->System->User Manager.

sudo apt-get install kuser

7. Install Zotero. Start Applications->Internet->Iceweasel and go to http://zotero.org/download. Install Zotero for Firefox then restart Iceweasel.

8. (Optional) Outwit Docs and Images. Start Applications->Internet->Iceweasel and go to http://www.outwit.com/products/images/. Install for Firefox then restart Iceweasel. Then go to http://www.outwit.com/products/docs/. Install for Firefox then restart Iceweasel. (N.B. not sure if these are working properly).

9. Java JDK.

sudo apt-get install default-jdk

10. Image, text and document processing tools and OCR.

sudo apt-get imagej
sudo apt-get install pandoc
sudo apt-get install tre-agrep 
sudo apt-get install pdftk
sudo apt-get install tesseract-ocr tesseract-ocr-eng 

11. Stanford Natural Language Processing Tools. Install the CoreNLP package and the Named Entity Recognition (NER) package. The latter is actually included in the former, but we install it separately to maintain backwards compatibility with tutorials I have already written.

wget http://nlp.stanford.edu/software/stanford-corenlp-full-2014-01-04.zip
unzip stanford*.zip
rm stanford*.zip
mv stanford* stanford-corenlp
wget http://nlp.stanford.edu/software/stanford-ner-2014-01-04.zip
unzip stanford-ner*.zip
rm stanford-ner*.zip
mv stanford-ner* stanford-ner

12. Install csvfix. Be careful with the rm command!

wget https://bitbucket.org/neilb/csvfix/get/c21e95d2095e.zip
unzip c21*zip
rm c21*zip
cd neilb*
make lin
sudo cp ./csvfix/bin/csvfix /usr/local/bin
cd ~
rm -r neilb*

13. Install graphviz and swish-e.

sudo apt-get install graphviz
sudo apt-get install swish-e

14. Install Javascript Libraries: D3.

sudo apt-get install libjs-d3

15a. Install Python Libraries: NLTK.

wget https://bootstrap.pypa.io/ez_setup.py -O - | sudo python
sudo easy_install pip
sudo pip install -U numpy
sudo pip install -U pyyaml nltk

15b. Install Python Libraries: SciPy stack.

sudo apt-get install python-numpy python-scipy python-matplotlib ipython ipython-notebook python-pandas python-sympy python-nose

15c. Install Python Libraries: Scikit-learn.

sudo apt-get install python-sklearn

15d. Install Python Libraries: Beautiful Soup.

sudo apt-get install python-beautifulsoup

15e. Install Python Libraries: Internet Archive.

sudo pip install internetarchive

15f. Install Python Libraries: Orange.

sudo easy_install orange

16. Install Open Refine.

wget  https://github.com/OpenRefine/OpenRefine/releases/download/2.5/google-refine-2.5-r2407.tar.gz
tar -xvf goo*gz
rm goo*gz
cd google-refine-2.5
./refine &

17. Install R.

sudo aptitude install r-base-dev
sudo aptitude install r-base-html r-doc-pdf

18. Install Overview Project.

wget https://github.com/overview/overview-server/releases/download/release%2F0.0.2014052801/overview-server-0.0.2014052801.zip
unzip overview*zip
rm overview*zip
cd overview*
./run &

Leave that running, start Iceweasel, browse to http://localhost:9000 and log in as admin@overviewproject.org with password admin@overviewproject.org. To quit, press Ctrl+C in the terminal where run is running. Don’t worry: your data is safe no matter when you quit.

19. Install SOLR. After this step it will be in ~/solr-4.8.1 and the example server can be run.

wget http://apache.mirror.vexxhost.com/lucene/solr/4.8.1/solr-4.8.1.tgz
tar zxvf solr-4.8.1.tgz 
rm solr-4.8.1.tgz 

20. Install MAHOUT. This requires subversion and maven.

sudo apt-get install subversion
sudo apt-get install maven
svn co http://svn.apache.org/repos/asf/mahout/trunk
cd trunk
mvn install

21. Install MALLET.

wget http://mallet.cs.umass.edu/dist/mallet-2.0.7.tar.gz
tar -zxvf mallet-2.0.7.tar.gz
rm mallet-2.0.7.tar.gz
wget http://topic-modeling-tool.googlecode.com/files/TopicModelingTool.jar

Run the GUI .jar file from the home directory with

java -jar TopicModelingTool.jar

22. Web Archiving Tools. We are using a deprecated copy of WARC tools that is better with full text.

sudo apt-get install git
git clone https://github.com/ianmilligan1/Historian-WARC-1.git

Copy Historian-WARC-1/warc/hanzo-warc directory to home directory and deleted Historian-WARC-1.

23. Install SEASR.

wget http://repository.seasr.org/Meandre/Releases/1.4/1.4.12/Meandre-1.4.12-linux.zip
unzip Meandre-1.4.12-linux.zip
rm Meandre-1.4.12-linux.zip
cd Meandre-1.4.12
sh Start-Infrastructure.sh
sh Start-Workbench.sh

In web browser navigate to http://localhost:1712/ and log in with

username: admin
password: admin
host: localhost
leave port at 1712

In workbench, open up the locations tab and add the following two locations to get default components and flows. Components (the first one) may take a few minutes because it’s downloading a ton of stuff. No worries.

When done, remember to return to the ‘Meandre-1.4.12’ directory and run

sh Stop-Workbench.sh
sh Stop-Infrastructure.sh

24. Install Voyant.

mkdir Voyant-Server
cd Voyant-Server
wget http://dev.voyant-tools.org/downloads/current/VoyantServer.zip
unzipVoyantServer.zip
java -jar VoyantServer.jar

Open web browser and navigate to http://127.0.0.1:8888. To stop the server, click Stop Server in the GUI.

25. Install Git Atom.

sudo apt-get install nodejs
sudo apt-get install libgnome-keyring-dev
wget http://nodejs.org/dist/v0.10.28/node-v0.10.28.tar.gz
tar xzvf node-v0.10.28.tar.gz
cd node-v0.10.28
./configure && make
sudo make install
git clone https://github.com/atom/atom
cd atom
script/build
sudo script/grunt install
sh atom.sh

26. Use the HistoryCrawler VM. Here are some links to help you get started

Many digital humanists are probably aware that they could make their research activities faster and more efficient by working at the command line. Many are probably also sympathetic to arguments for open source, open content and open access. Nevertheless, switching to Linux full-time is a big commitment. Virtualization software, like Oracle’s free VirtualBox, allows one to create Linux machines that run inside a window on a Mac or PC. Since these virtual machines can be created from scratch whenever you need one, they make an ideal platform for learning command line techniques. They can also be customized for particular research tasks, as I will show in later posts.

In this post I show how to create a Debian Linux virtual machine inside VirtualBox. It has a GUI desktop installed (KDE), so you can interact with it both by using commands entered in a shell and by clicking with a mouse. The screenshots come from a Mac, but the install process should be basically the same for a Windows PC.

To get started, you need to download two things. The first of these is a disk image file (ISO) for the version of Linux you want to install. These files are different depending on the processor in your computer. Here the disk image that I will use is a 32-bit testing installation with KDE, for maximum compatibility with both Macs and PCs. Check the Debian distribution page for more details. The other thing that you need to download is the Oracle VirtualBox software for your operating system. Once you have downloaded VirtualBox, install it and then start it.

The image below shows the VirtualBox Manager running on my Mac. I have already created three other Linux virtual machines, but we can ignore these.

00-virtualbox-managerTo create a new virtual machine, click the “New” button in the upper left hand corner of the Manager. Debian Linux comes in three standard flavours, known as “stable,” which is very solid but not very up-to-date, “testing,” which is pretty solid and reasonably up-to-date, and “unstable,” which is just that. I am going to name my machine ‘HistoryCrawler’ along with some information about the date and processor.  You can call yours whatever you’d like.

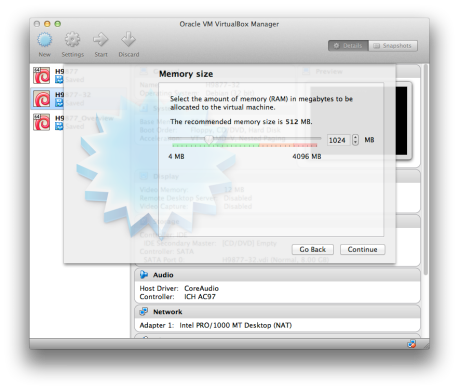
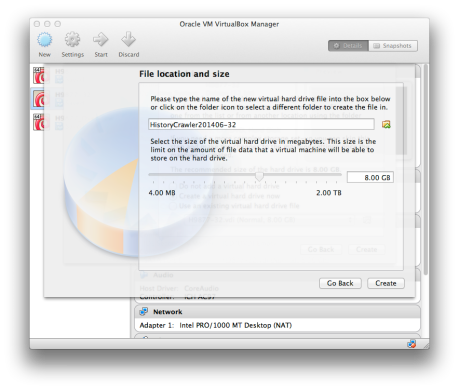
historycrawler-01Once you click “Continue,” the VirtualBox software will ask you a number of questions. For this installation we are going to use a memory size of 1024 megabytes of RAM (this can be increased later), a virtual hard drive formatted as a VDI (VirtualBox Disk Image), dynamically allocated disk storage, and 16 gigabytes for the virtual machine.


historycrawler-02

03-virtual-hard-drive

04-virtualbox-disk-image

05-dynamically-allocated


(I originally set the virtual hard drive size to 8 GB but we later had to increase it to 16 GB. So choose 16 GB here, despite the pictures below.)

historycrawler-03

Once we have set all of the options for the virtual machine, we are returned to the VirtualBox Manager.

historycrawler-04

Now we choose the virtual machine we just created and click the “Start” button in the Manager. The new machine starts with a message about how the mouse is handled when the cursor is over the virtual machine window.

08-auto-capture-keyboard

Once you’ve read and accepted the message, the virtual machine will ask you for a start-up disk.

09-select-startup-diskClick the file icon with the green up arrow on it, and you will be given a dialog that lets you choose the Debian ISO file you downloaded earlier.

historycrawler-05

The ISO file is now selected.

11-start-iso-file-installation

When you click “start” the Debian Install process will begin in the virtual machine window.

12-debian-install

You can move around the installer options with the Up and Down arrows and Tab key. Use the Enter key to select an item. If there are options, you can usually turn them on or off with the Space bar. Here, press Enter to choose the “Install” option.

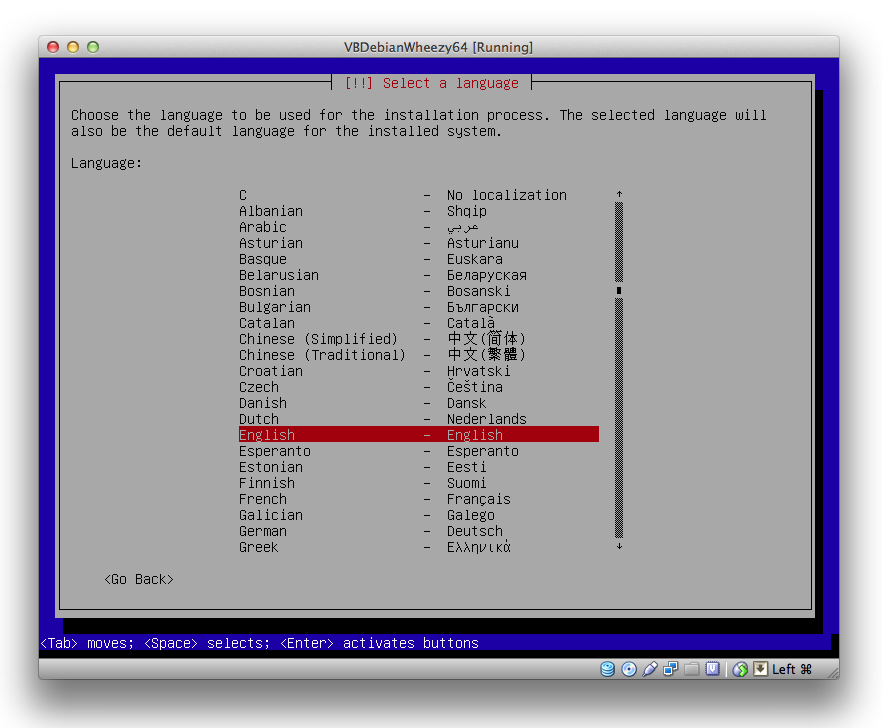
Next you want to select your language, location and preferred keyboard layout.

13-choose-language

14-choose-location

15-choose-keyboardThe installer will ask you for a hostname and a domain name. You can set the former to whatever you’d like; leave the latter blank unless you have a reason to set it.


historycrawler-07

17-blank-domain-nameNext, the installer will ask you for a root password. In Linux and Unix systems, the root account typically has the power to do everything, good and bad. Rather than setting a root password, we are going to leave the root password entry blank. The installer will respond by not creating a root account, but rather by giving the user account (i.e., you) sudo privileges.

18-blank-root-password

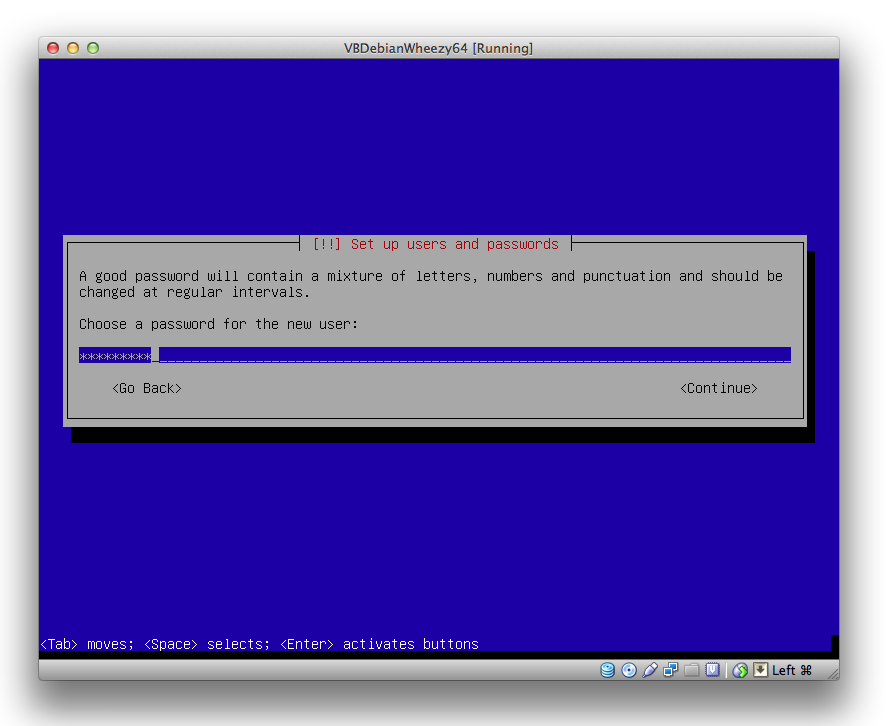
19-confirm-blank-root-passwordNow that the root account is disabled, you can enter your own name, username and password, and set the time zone.


historycrawler-08


historycrawler-09

22-set-user-password

23-confirm-user-password

24-set-timezoneThe next set of screens ask you to specify how you would like the file system to be set up. As before, we will use the defaults. Later, when you are more familiar with creating virtual machines for specific tasks, you can tweak these as desired. We want guided partitioning, and we are going to use the entire virtual disk (this is the 8Gb dedicated to this particular virtual machine)

25-guided-entire-disk-partitionWe only have one disk to partition, so we choose it.

26-partition-disksWe want all of our files in one partition for now.  Later, if you decide to do a lot of experimentation with Linux you may prefer to put your stuff in separate partitions when you create new virtual machines.

27-all-files-one-partitionWe can finish the partitioning…

28-finish-partitioning

and write the changes to disk.

29-write-changes-to-diskNow the install process will ask us if we want to use other disk image files.  We do not.

30-dont-scan-another-diskWe are going to grab install files from the Internet instead of from install disk images. (If you are working in a setting where downloads are expensive, you may not wish to do this.) We set up a network mirror to provide the install files.

31-use-network-mirror

Tell the installer what country you are in.

32-choose-mirror-countryThen choose a Debian archive mirror. The default mirror is a good choice.

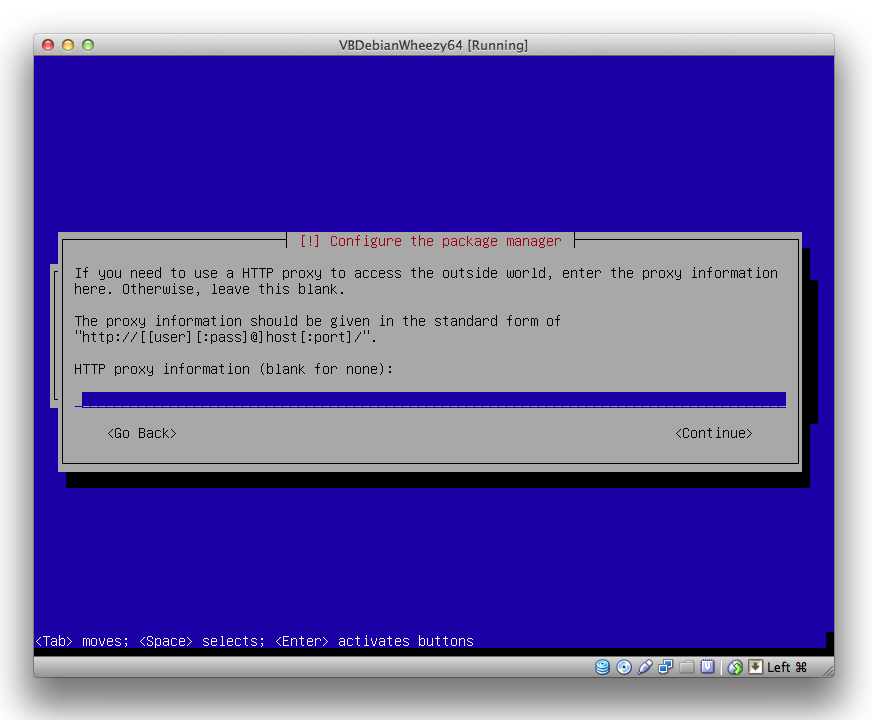
33-choose-mirrorNow the installer will ask if we want to use a proxy server. Leave this blank unless you have a reason to change it.

34-blank-http-proxyI opt out of the popularity contest.

35-no-popularity-contestDebian gives you a lot of options for pre-installed bundles of software.  Here we are going to install the Debian Desktop Environment (the GUI, KDE), the web and print servers, a SQL database, file server, SSH server and standard system utilities. If you are working on a laptop, check the laptop box, too.

historycrawler-10

The final step is to install the Grub bootloader.


historycrawler-11

Now the virtual machine will reboot when you click “Continue”.

38-finish-installationThis is the login prompt for your new Debian virtual machine.

historycrawler-12

You can use Linux commands to shutdown the virtual machine if you would like.  You can also save it in such a way that it will resume where you left off when you reload it in VirtualBox. In the VirtualBox Manager, right click on the virtual machine and choose “Close”->”Save State”. That is shown in the next screenshot.

40-close-vmYou can save backups of your virtual machine whenever you reach a crucial point in your work, store VMs in the cloud, and share them with colleagues or students. You can also create different virtual machines for different tasks and use them to try out other Linux distributions. On my Macs, I also have Win XP and Win 7 VMs so I can run Windows-only software.

644337888_debcbcd347_z-edited

Introduction

In previous posts we started with the URLs for particular online resources (books, collections, etc.) without worrying about where those URLs came from. Here we will use a variety of tools for locating primary and secondary sources of interest and keeping track of what we find. We will be focusing on the use of web services (also known as APIs or application programming interfaces). These are online servers that respond to HTTP queries by sending back text, usually marked up with human- and machine-readable metadata in the form of XML or JSON (JavaScript Object Notation). Since we’ve already used xmlstarlet to parse XML, we’ll get various web services to send us XML-formatted material.

Setup and Installation

In order to try the techniques in this blog post, you will need to sign up for (free) developer accounts at OCLC and Springer. First, OCLC. Go to this page and create an account. The user name that you choose will be your “WorldCat Affiliate ID” when you access OCLC web services. Once you have a user name and password for OCLC, go to the WorldCat Basic API site and log in there. The go to the Documentation page and on the left hand side menu you will see an entry under WorldCat Basic that reads “Request an API key”. This will take you to another site where you choose the entry “Sign in to Service Configuration”. Use your OCLC user name and password to sign in. On the left hand side of this site is a link for “Web Service Keys” -> “Request Key”. On the next page choose “Production” for the environment, “Application hosted on your server” for the application type, and “WorldCat Basic API” for the service. You will then be taken to a second page where you have to provide your name, email address, country, organization, web site and telephone number. Once you have accepted the terms, the system will respond by giving you a long string of letters and numbers. This is your wskey, which you will need below.

Second, Springer. Go to this page and create an account. Once you have registered, generate an API key for Springer Metadata. You will need to provide a name for your app, so choose something meaningful like linux-command-line-test. Make a note of the key, as we will be using this web service below.

Start your windowing system and open a terminal and web browser. I am using Openbox and Iceweasel on Debian, but these instructions should work for most flavors of Linux. In Iceweasel choose Tools -> Add-ons and install JSONView. Restart your browser when it asks you to.

You will also need the Zotero extension for your browser (if it is not already installed). In the browser, go to http://www.zotero.org and click the “Download Now” button, followed by the “Zotero 4.0 for Firefox” button. You will have to give permission for the site to install the extension in your browser. Once the extension has been downloaded, click “Install Now” then restart your browser. If you haven’t used Zotero before, spend some time familiarizing yourself with the Quick Start Guide.

Using Zotero to manage bibliographic references in the browser

In the browser, try doing some searches in the Internet Archive, Open WorldCat, and other catalogs. Use the item and folder icons in the URL bar to automatically add items to your Zotero collection. This can be a great time saver, but it is a good idea to get in the habit of looking at the metadata that has been added and making sure that it is clean enough for your own research purposes.

If you register for an account at Zotero.org, you can automatically synchronize your references between computers, create an offsite backup of your bibliographic database, and access your references using command line tools. For the purposes of this post, you can use a small sample bibliography that I put on the Zotero server at https://www.zotero.org/william.j.turkel/items/collectionKey/JPP66HBN. My Zotero user ID, which you will need for some of the commands below, is 31530.

Querying the Zotero API

The Zotero server has an API which can be accessed with wget. The results will be returned in the Atom syndication format, which is XML-based, so we can parse it with xmlstarlet. Let’s begin by getting a list of the collections which I have synchronized with the Zotero server. The –header option tells wget that we would like to include some additional information that is to be sent to the Zotero server. The Zotero server uses this message to determine which version of the API we want access to. We store the file that the Zotero server returns in collections.atom, then use xmlstarlet to pull out the fields feed/entry/title and feed/entry/id. Note that the Atom file that the Zotero server returns actually contains two XML namespaces (learn more here) so we have to specify which one we are using with the -N option.

wget --header 'Zotero-API-Version: 2' 'https://api.zotero.org/users/31530/collections?format=atom' -O collections.atom
less collections.atom
xmlstarlet sel -N a="http://www.w3.org/2005/Atom" -t -m "/a:feed/a:entry" -v "a:title" -n -v "a:id" -n collections.atom

Since there is only one collection, we get a single result back.

botanical-exploration
http://zotero.org/users/31530/collections/JPP66HBN

Now that we know the ID for the botanical-exploration collection, we can use wget to send another query to the Zotero API. This time we request all of the items in that collection. We can get a quick sense of the collection by using xmlstarlet to pull out the item titles and associated IDs.

wget --header 'Zotero-API-Version: 2' 'https://api.zotero.org/users/31530/collections/JPP66HBN/items?format=atom' -O items.atom
less items.atom
xmlstarlet sel -N a="http://www.w3.org/2005/Atom" -t -m "/a:feed/a:entry" -v "a:title" -n -o "    " -v "a:id" -n items.atom > items-title-id.txt
less items-title-id.txt

A web page bibliography

We can also request that the Zotero server send us a human-readable bibliography if we want. Use File -> Open File in your browser to view the biblio.html file.

wget --header 'Zotero-API-Version: 2' 'https://api.zotero.org/users/31530/collections/JPP66HBN/items?format=bib' -O biblio.html

Note that each of our sources has an associated URL, but that there are no clickable links. We can fix this easily with command line tools. First we need to develop a regular expression to extract the URLs. We want to match everything that begins with “http”, up to but not including the left angle bracket of the enclosing div tag. We then use sed to remove the trailing period from the citation.

less biblio.html
grep -E -o "http[^<]+" biblio.html | sed 's/.$//g'

That looks good. Now we want to rewrite each of the URLs in our biblio.html file with an HTML hyperlink to that address. In other words, we have a number of entries that look like this

http://archive.org/details/jstor-1643175.</div>

and we want them to look like this

<a href="http://archive.org/details/jstor-1643175">http://archive.org/details/jstor-1643175</a>.</div>

Believe it or not, we can do this pretty easily with one sed command. The -r option indicates that we want to use extended regular expressions. The \1 pattern matches the part of the regular expression that is enclosed in parentheses. Use diff on the two files to see the changes that we’ve made, then open biblio-links.html in your browser. Each of the URLs is now a clickable link.

sed -r 's/(http[^<]+)\.</<a href="\1">\1<\/a>.</g' biblio.html > biblio-links.html
diff biblio.html biblio-links.html

Getting more information for one item

We can ask Zotero to send us more information about a particular item in the collection. Using the command below, we request the details for Isabel Cunningham’s Frank N. Meyer, Plant Hunter in Asia.

wget --header 'Zotero-API-Version: 2' 'https://api.zotero.org/users/31530/items/RJS46ARB?format=atom' -O cunningham.atom
less cunningham.atom

Note that the fields in cunningham.atom that contain bibliographic metadata (creator, publisher, ISBN, etc.) are stored in an HTML div within the XML content tag. We can use xmlstarlet to pull these fields out, but we have to pay attention to the XML namespaces. We start by creating an expression to pull out the XML content tag.

xmlstarlet sel -N a="http://www.w3.org/2005/Atom" -t -m "/a:entry" -v "a:content" -n cunningham.atom

To get access to the material inside the HTML tags, we add a second namespace to our xmlstarlet expression as follows. Note that we also have to specify the attribute for the HTML tr tag.

xmlstarlet sel -N a="http://www.w3.org/2005/Atom" -N x="http://www.w3.org/1999/xhtml" -t -m "/a:entry/a:content/x:div/x:table/x:tr[@class='ISBN']" -v "x:td" -n cunningham.atom

There are two ISBNs stored in that field.

0813811481 9780813811482

To make sure you understand how the XML parsing works, try modifying the expression to extract the year of publication and other fields of interest.

Getting information with an ISBN

OCLC has a web service called xISBN which allows you to submit an ISBN and receive more information about the work, including related ISBNs, the Library of Congress Control Number (LCCN) and a URL for the item’s WorldCat page. To use this service you do not need to provide an API key, but you do need to include your WorldCat Affiliate ID. So in the commands below, be sure to replace williamjturkel (which is my WorldCat Affiliate ID) with your own. Let’s request more information about the Cunningham book using the 10-digit ISBN we extracted above, 0813811481. First we will write a short Bash script to interact with the service. We will call this script get-isbn-editions.sh.

#!/bin/bash

affiliateid="williamjturkel"

isbn=$1
format=$2

wget "http://xisbn.worldcat.org/webservices/xid/isbn/"${isbn}"?method=getEditions&format="${format}"&fl=*&ai="${affiliateid} -O "isbn-"${isbn}"."${format}

Next we use our script to call the web service three times, asking for the information to be returned in text, CSV and XML formats. We can use less to have a look at each of the three files, but if we wanted to parse out specific information, we might use csvfix for the CSV file and xmlstarlet for the XML file.

chmod 744 get-isbn-editions.sh
./get-isbn-editions.sh "0813811481" "txt"
./get-isbn-editions.sh "0813811481" "csv"
./get-isbn-editions.sh "0813811481" "xml"
less isbn-0813811481.txt
less isbn-0813811481.csv
less isbn-0813811481.xml

Let’s parse the LCCN and WorldCat URL out of the XML file.

xmlstarlet sel -t -v "//@lccn" -n isbn-0813811481.xml
xmlstarlet sel -t -v "//@url" -n isbn-0813811481.xml

The system responds with

83012920
http://www.worldcat.org/oclc/715401288?referer=xid

The URL allows us to see the WorldCat webpage for our book in a browser. With the LCCN, one thing that we can do is to query the Library of Congress catalog and receive a MODS (Metadata Object Description Schema) record formatted as XML. Note that the MODS file contains other useful information, like the Library of Congress Subject Heading fields (LCSH). We can parse these out with xmlstarlet. Note that the parts of the subject heading fields are jammed together. Can you modify the xmlstarlet command to fix this?

wget "http://lccn.loc.gov/83012920/mods" -O cunningham.modsxml
less cunningham.modsxml
xmlstarlet sel -N x="http://www.loc.gov/mods/v3" -t -v "/x:mods/x:subject[@authority='lcsh']" -n cunningham.modsxml

You can also import from a MODS file directly into Zotero. Suppose that you’re doing some command line searching and come across E. H. M. Cox’s 1945 Plant-Hunting in China (LCCN=46004786). Once you have imported the MODS XML file with wget, you can use the Zotero Import command (under the gear icon) to load the information directly into your bibliography.

wget "http://lccn.loc.gov/46004786/mods" -O cox.modsxml

As we have seen in previous posts, many of these fields serve as links between data sets, allowing us to search or spider the ‘space’ around a particular person, institution, subject, or work.

Querying the WorldCat Basic API

In addition to querying by ISBN, OCLC has a free web service that allows us to search the WorldCat catalog. In this case you will need to provide your wskey when you send requests. Use vi to create a file called oclc-wskey.txt and save your wskey in it.

The WorldCat Basic API allows you to send queries to WorldCat from the command line. Create the following Bash script and save it as do-worldcat-search.sh

#!/bin/bash

wskey=$(<oclc-wskey.txt)
query=$1

wget "http://www.worldcat.org/webservices/catalog/search/opensearch?q="${query}"&count=100&wskey="${wskey} -O $2

Now you can execute the script as follows

chmod 744 do-worldcat-search.sh
./do-worldcat-search.sh "botanical+exploration+china" china.atom

Since the results are in Atom XML format, you can use xmlstarlet to parse them, just as you did with the Atom files returned by the Zotero server. For example, you can scan the book titles with

xmlstarlet sel -N a="http://www.w3.org/2005/Atom" -t -m "/a:feed/a:entry" -v "a:title" -n china.atom | less -NS

The WorldCat Basic API has a lot more functionality that we haven’t touched on here, so be sure to check the documentation to learn about other things that you can do with it.

Using the Springer API to find relevant sources

Since the Springer API needs a key, use vi to create a file called springer-metadata-key.txt. You can search for metadata related to a particular query using a command like the one shown below. Here we get the server to return the more human-readable JSON-formatted results as well as XML ones. Since we installed the JSONView add-on for Iceweasel, if we open the botanical-exploration.json file in our browser, it will be pretty-printed with fields that can be collapsed and expanded. Note that the metadata returned by the Springer web service includes a field that indicates whether the source is Open Access or not.

wget "http://api.springer.com/metadata/pam?q=title:botanical+exploration&api_key="$(<springer-metadata-key.txt) -O botanical-exploration.xml
less botanical-exploration.xml
wget "http://api.springer.com/metadata/json?q=title:botanical+exploration&api_key="$(<springer-metadata-key.txt) -O botanical-exploration.json

The URLs make use of the DOI (Digital Object Identifier) system to uniquely identify each resource. These identifiers can be resolved at the command line with a call from wget. Note that we create a local copy of the Springer web page when we do this. You can use your browser to open the resulting file, brittons.html. Note that this page contains references cited by the paper in human readable form, which might become useful as you further develop your workflow.

wget "http://dx.doi.org/10.1007/BF02805294" -O brittons.html

2489619858_9b55cdb4ed_z-edited

Introduction

In the previous post we used the OCLC WorldCat Identities database to learn more about Frank N. Meyer, a botanist who made a USDA-sponsored expedition to South China, 1916-18. We requested that the server return information to us that had been marked up with XML, then extracted unique identifiers for other identities in the database that are linked to the record for Meyer. We also used a package called Graphviz to visualize the core of the network connecting Meyer to his associates. If you haven’t worked through that post, you should do so before trying this one.

A spider (or ‘crawler’ or ‘bot’) is a program that downloads a page from the Internet, saves some or all of the content, extracts links to other webpages, then retrieves and processes those in turn. Search engine companies employ vast numbers of spiders to maintain up-to-date maps of the web. Although spidering on the scale of the whole web is a difficult problem–and one that requires an elaborate infrastructure to solve–there are many cases when more limited spidering can play an important role in the research process. Here we will develop a surprisingly simple Bash script to explore and visualize a tiny region of the WorldCat Identities database.

Our algorithm in plain English

When coming up with a new program, it helps to alternate between top-down and bottom-up thinking. In the former case, you try to figure out what you want to accomplish in the most basic terms, then figure out how to accomplish each of your goals, sub-goals, and so on. That is top-down. At the same time, you keep in mind the stuff you already know how to do. Can you combine two simpler techniques to accomplish something more complicated? That is bottom-up.

Here is a description of what we want our spider to do:

  • repeat the following a number of times
    • get a unique identifier from a TO-DO list, make a note of it, then move it to a DONE list
    • retrieve the web page for that ID and save a copy
    • pull out any linked identifiers from the web page
    • keep track of links between the current identifier and any associated identifiers so we can visualize them
    • if any of the linked identifiers are not already in the DONE list, add them to the TO-DO list
    • pause for a while

As we look at this description of the spider, it is clear that we already know how to do some of these things. We can probably use a for loop to repeat the process a number of times. We know how to retrieve an XML webpage from the WorldCat Identities database, save a copy and extract the associated identities from it. We also have a basic idea of how to graph the resulting network with Graphviz. Let’s build our spidering script one step at a time.

The main loop

In our first version of the program, we include the for loop and use comments to sketch out the rest of the structure. Use a text editor (like atom or vi) to write the following script, save it as spider-1.sh, then change permissions to 744 with chmod and try running it.

#! /bin/bash

for i in {1..10}
do

     # if TODO list is not empty then do the following

          # get first LCCN from TODO list and store a copy

          echo "Processing $i"

          # remove LCCN from TODO list

          # append LCCN to DONE list

          # retrieve XML page for LCCN and save a local copy

          # get personal name for LCCN

          # pull out LCCNs for associated ids and get personal names

          # save links between LCCNs in GRAPH file

          # if LCCNs for assoc ids are not in DONE list, add to TODO list

          # sleep 2

done

The sleep command will pause between downloads, so we don’t hammer the OCLC server. For now, we have commented it out, however, so our tests run quickly. We don’t need to enable it until we are actually contacting their server. Note that we use indenting to help us keep track of which blocks of commands are nested inside of other blocks.

The TODO list

We will use external files to keep track of which LCCNs we have already processed, which ones we still need to process, and which links we have discovered between the various identities in the WorldCat database. Let’s start with the list of LCCNs that we want to process. We are going to keep these in a file called spider-to-do.txt. Create this file with the command

echo "lccn-n83-126466" > spider-to-do.txt

Make a copy of spider-1.sh called spider-2.sh and edit it so that it looks like the following.

#! /bin/bash

for i in {1..10}
do
     # if TODO list is not empty then do the following
       if [ -s spider-to-do.txt ]
       then

          # get first LCCN from TODO list and store a copy
          lccn=$(head -n1 spider-to-do.txt)

          echo "Processing $i, $lccn"

          # remove LCCN from TODO list
          sed -i '1d' spider-to-do.txt

          # append LCCN to DONE list
          echo $lccn >> spider-done.txt

          # retrieve XML page for LCCN and save a local copy

          # get personal name for LCCN

          # pull out LCCNs for associated ids and get personal names

          # save links between LCCNs in GRAPH file

          # if LCCNs for assoc ids not in DONE list, add to TODO list

          # sleep 2
     fi
done

Note that we have added the logic which tests to make sure that our TODO list is not empty. This uses a primary expression which will be true if the spider-to-do.txt file exists and its size is greater than zero. We have also added code to get the first LCCN in the TODO list and save a copy in a variable called lccn. Using sed and echo we remove the LCCN from the TODO list and append it to the DONE list. Finally, note that we modified the echo statement so that it tells us which LCCN the script is currently processing. Check the permissions for spider-2.sh and try executing it. Make sure that you understand that it executes the for loop ten times, but that the if statement is only true once (since there is only one entry in spider-to-do.txt. So we only see the output of echo once.

Retrieving a webpage

The next step is to retrieve the XML version of the WorldCat Identities page for the current LCCN and extract the personal name for the identity. Make a copy of spider-2.sh called spider-3.sh and modify it so it looks as follows.

#! /bin/bash

for i in {1..10}
do
     # if TODO list is not empty then do the following
       if [ -s spider-to-do.txt ]
       then

          # get first LCCN from TODO list and store a copy
          lccn=$(head -n1 spider-to-do.txt)

          echo "Processing $i, $lccn"

          # remove LCCN from TODO list
          sed -i '1d' spider-to-do.txt

          # append LCCN to DONE list
          echo $lccn >> spider-done.txt

          # retrieve XML page for LCCN and save a local copy
          wget "http://www.worldcat.org/identities/"${lccn}"/identity.xml" -O ${lccn}.xml

          # get personal name for LCCN
          currname=$(xmlstarlet sel -T -t -m "/Identity/nameInfo" -o "\"" -v "rawName/suba" -o "\"" -n ${lccn}.xml | tr -d ' ')

          echo "Current name $currname"

          # pull out LCCNs for associated ids and get personal names

          # save links between LCCNs in GRAPH file

          # if LCCNs for assoc ids not in DONE list, add to TODO list

          # sleep 2
     fi
done

As in the previous post, we use wget to retrieve the file and xmlstarlet to extract information from it. We also use the echo command to display the personal name of the LCCN we are processing.

Before we try running this version of our spider, it will be handy to have a small script to reset our spider so we can run it again. Use a text editor to enter the following script and save it as reset-spider.sh. Change the permissions to 744 and execute it, then execute spider-3.sh. Note that the reset script will notify you that some files don’t exist. That’s OK, as they will exist eventually.

#! /bin/bash

echo "lccn-n83-126466" > spider-to-do.txt
rm spider-done.txt
rm spider-graph*
rm lccn*xml

You should now have a file called lccn-n83-126466.xml which was downloaded from the WorldCat Identities database. Your spider-to-do.txt file should be empty, and your spider-done.txt file should contain the LCCN you started with. You can try resetting the spider and running it again. You should get the same results, minus a few warning messages from the reset script.

Associated identities and personal names

Next we need to extract the associated identities for the LCCN we are processing, and get personal names for each. Make a copy of spider-3.sh called spider-4.sh and edit it so that it looks like the following. As before, we use the echo command to have a look at the variables that we are creating.

#! /bin/bash

for i in {1..10}
do
     # if TODO list is not empty then do the following
       if [ -s spider-to-do.txt ]
       then

          # get first LCCN from TODO list and store a copy
          lccn=$(head -n1 spider-to-do.txt)

          echo "Processing $i, $lccn"

          # remove LCCN from TODO list
          sed -i '1d' spider-to-do.txt

          # append LCCN to DONE list
          echo $lccn >> spider-done.txt

          # retrieve XML page for LCCN and save a local copy
          wget "http://www.worldcat.org/identities/"${lccn}"/identity.xml" -O ${lccn}.xml

          # get personal name for LCCN
          currname=$(xmlstarlet sel -T -t -m "/Identity/nameInfo" -o "\"" -v "rawName/suba" -o "\"" -n ${lccn}.xml | tr -d ' ')

          echo "Current name $currname"

          # pull out LCCNs for associated ids and get personal names
          associd=$(xmlstarlet sel -T -t -m "/Identity/associatedNames/name" -v "normName" -n ${lccn}.xml | grep 'lccn')

          echo "Associated LCCNs"
          echo $associd

          assocname=$(xmlstarlet sel -T -t -m "/Identity/associatedNames/name" -o "\"" -v "rawName/suba" -o "\"" -n ${lccn}.xml | tr -d ' ')

          echo "Associated names"
          echo $assocname

          # save links between LCCNs in GRAPH file

          # if LCCNs for assoc ids not in DONE list, add to TODO list

          # sleep 2
     fi
done

The final version of the spider

We have two remaining problems that we need to solve in order to get our spider up and running. First, we want to save all of the links between the various identities in a file so that we can visualize them with graphviz. This involves looping through the assocname array with a for loop, and appending each link to a file that we are going to call spider-graph.dot. The second problem is to add LCCNs to our TODO list, but only if we haven’t already DONE them. We will use an if statement and the fgrep command to test whether the spider-done.txt file already contains an LCCN, and if not, append it to spider-to-do.txt. Copy the spider-4.sh file to a version called spider-final.sh, and edit it so that it looks as follows. Note that we are hitting the WorldCat Identities database repeatedly now, so we need to uncomment the sleep command.

#! /bin/bash

for i in {1..10}
do
     # if TODO list is not empty then do the following
       if [ -s spider-to-do.txt ]
       then

          # get first LCCN from TODO list and store a copy
          lccn=$(head -n1 spider-to-do.txt)

          echo "Processing $i, $lccn"

          # remove LCCN from TODO list
          sed -i '1d' spider-to-do.txt

          # append LCCN to DONE list
          echo $lccn >> spider-done.txt

          # retrieve XML page for LCCN and save a local copy
          wget "http://www.worldcat.org/identities/"${lccn}"/identity.xml" -O ${lccn}.xml

          # get personal name for LCCN
          currname=$(xmlstarlet sel -T -t -m "/Identity/nameInfo" -o "\"" -v "rawName/suba" -o "\"" -n ${lccn}.xml | tr -d ' ')

          echo "Current name $currname"

          # pull out LCCNs for associated ids and get personal names
          associd=$(xmlstarlet sel -T -t -m "/Identity/associatedNames/name" -v "normName" -n ${lccn}.xml | grep 'lccn')

          echo "Associated LCCNs"
          echo $associd

          assocname=$(xmlstarlet sel -T -t -m "/Identity/associatedNames/name" -o "\"" -v "rawName/suba" -o "\"" -n ${lccn}.xml | tr -d ' ')

          echo "Associated names"
          echo $assocname

          # save links between LCCNs in GRAPH file
          for a in ${assocname[@]}
          do
               echo "  "${currname}" -> "${a}";" >> spider-graph.dot
          done

          # if LCCNs for assoc ids not in DONE list, add to TODO list
          for a in ${associd[@]}
          do
               if ! fgrep -q ${a} spider-done.txt
               then
                    echo ${a} >> spider-to-do.txt
               fi
          done

          sleep 2
     fi
done

Reset the spider, then try running the final version. When it finishes running, you should have ten XML files in your directory. Use the less command to explore them, and the spider-to-do.txt, spider-done.txt and spider-graph.dot files.

Visualizing the network of identities

Now we can write a very small script to visualize the links between identities. Save the following as graph-spider.sh, change the permissions to 744 and execute it. Note that we are adding some formatting commands to our Graphviz file so that the nodes look a particular way. You can experiment with changing these to suit yourself.

#! /bin/bash

echo "digraph G{" > spider-graph-temp.dot
echo "  node [color=grey, style=filled];" >> spider-graph-temp.dot
echo "  node [fontname=\"Verdana\", size=\"20,20\"];" >> spider-graph-temp.dot
cat spider-graph.dot | sort | uniq >> spider-graph-temp.dot
echo "}" >> spider-graph-temp.dot

neato -Tpng -Goverlap=false spider-graph-temp.dot > spider-graph.png
display spider-graph.png &

The resulting network graph looks something like this:

spider-graph-2014

Why store the spider’s memory in external files?

If you have some experience with programming, you may be wondering why I chose to store the TODO and DONE lists in external files, rather than in memory in the form of Bash script variables. Note that when you finish running the spider for the first time, you have ten XML files in your current directory and a bunch of stuff in your spider-to-do.txt, spider-done.txt and spider-graph.dot files. In fact, you can resume the spidering process by simply running spider-final.sh again. New XML files will be added to your current directory, and the TODO and DONE lists and GRAPH file will all be updated accordingly. If you want to restart at any point, you can always run the reset script. If you find that your spider is getting stuck exploring part of the network that is not of interest, you can also add LCCNs to the DONE list before you start the spider. Using external files to store the state of the spider makes it very easy to restart it. This would be more difficult if the spider’s process were stored in memory instead.